Register a custom taxonomy in WordPress to group your content your own way, beyond
the built-in categories and tags. First, register_taxonomy() on the
init hook creates the taxonomy and attaches it to a post type.
Then WordPress gives it an admin panel, term archives, and REST support. This tutorial adds a
hierarchical Topic taxonomy to posts, and shows how one flag switches it to a flat,
tag-style list instead.
Requirements to register a custom taxonomy:
- WordPress 6.0 or newer (tested on WordPress 7.0.2).
- PHP 7.4 or newer — the version your WordPress already runs on.
- Access to add a plugin, or a child theme whose functions.php you can edit.
How To Register a Custom Taxonomy in WordPress.
The objective is to register a custom taxonomy named Topic and attach it to the
standard post type. Specifically, it appears in the editor, gets
its own term archives under /topic/, and lists a post’s topics on the front end. A
single argument decides whether terms nest like categories or stay flat like tags.
Step 1.
First, create a plugin so the taxonomy survives a theme switch. In
wp-content/plugins/, make a folder named topic-taxonomy and, inside it, a file
named topic-taxonomy.php. The header comment lists it on the Plugins screen.
<?php
/**
 * Plugin Name: Topic Taxonomy
 * Description: Registers a hierarchical "Topic" taxonomy for posts.
 * Version:     1.0.0
 */

// Exit if accessed directly.
if (!defined('ABSPATH')) {
    exit;
}
A taxonomy is not stored in your theme. Therefore, keeping it in a plugin means switching
themes never strips the grouping from your posts.
Step 2.
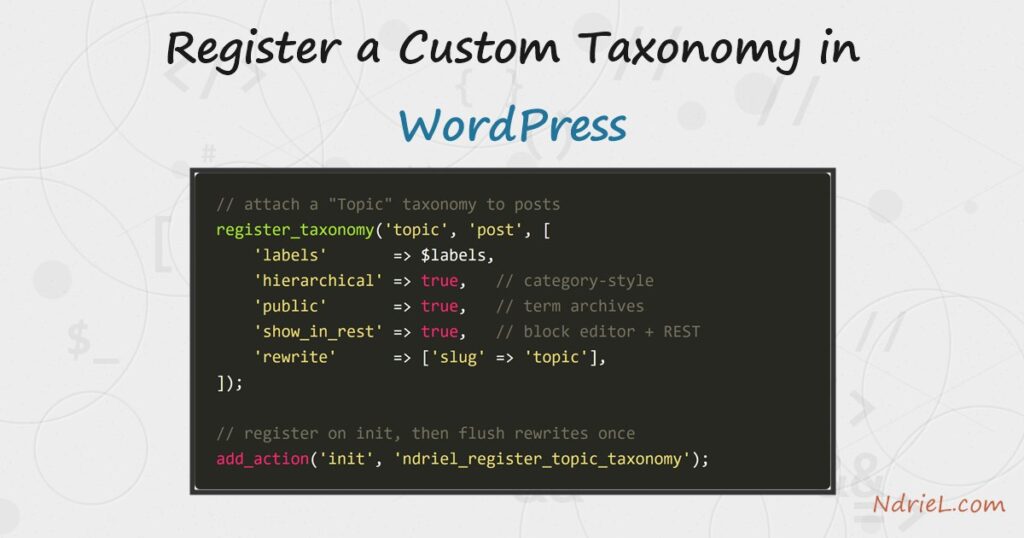
Next, define the labels and register the taxonomy on the init
hook. Hand register_taxonomy() three things: the taxonomy key, the
post type it attaches to, and an arguments array. Add this below the header.
function ndriel_register_topic_taxonomy() {

    // The text WordPress shows around the admin UI.
    $labels = array(
        'name'          => 'Topics',        // general (plural) name
        'singular_name' => 'Topic',         // one term
        'menu_name'     => 'Topics',        // the sidebar submenu
        'all_items'     => 'All Topics',
        'edit_item'     => 'Edit Topic',
        'add_new_item'  => 'Add New Topic',
        'search_items'  => 'Search Topics',
    );

    $args = array(
        'labels'            => $labels,
        'hierarchical'      => true,        // true = category-style (nested)
        'public'            => true,        // front-end term archives
        'show_admin_column' => true,        // a column on the Posts list
        'show_in_rest'      => true,        // block editor + REST API
        'rewrite'           => array('slug' => 'topic'), // /topic/<term>/
    );

    register_taxonomy('topic', 'post', $args);
}
add_action('init', 'ndriel_register_topic_taxonomy');
The first argument, 'topic', is the taxonomy’s internal key. Keep
it lowercase and under 32 characters. Registering on init is
required; run it earlier and WordPress is not ready, run it later and the rewrite rules and
admin panel miss it.
Step 3.
Then, choose hierarchical or flat with one flag. Above, 'hierarchical' => true
makes Topic behave like categories: terms nest, and the editor shows checkboxes.
Flip it to false and the same taxonomy becomes tag-style instead.
// Flat, tag-style: no nesting, a free-type term box in the editor.
$args['hierarchical'] = false;
register_taxonomy('tag_topic', 'post', $args);
The data model is the only real difference. A hierarchical term can have a parent, while a
flat term cannot. As a result, pick hierarchical for structured sections and flat for loose
keywords.
Step 4.
Next, activate the plugin under Plugins. A Topics submenu then appears under
Posts, and the editor gains a Topics panel. Add a term or two, assign them to a
post, and update it. One gotcha follows: the /topic/<term>/ archives return 404
until the rewrite rules are rebuilt.
// Run once on plugin activation, never on every init.
register_activation_hook(__FILE__, function () {
    ndriel_register_topic_taxonomy();
    flush_rewrite_rules();
});
Alternatively, just visit Settings → Permalinks and click Save Changes
once to flush them by hand. Either way, do it after the taxonomy exists.
Step 5.
Finally, show a post’s topics in the theme. Call get_the_term_list()
with the post id and the taxonomy key. It returns the terms as ready-made links to their
archives, so you can echo it straight into a template or a filter.
function ndriel_show_topics($content) {
    if (!is_singular('post') || !in_the_loop() || !is_main_query()) {
        return $content;
    }
    $list = get_the_term_list(get_the_ID(), 'topic', 'Topics: ', ', ');
    if (is_wp_error($list) || empty($list)) {
        return $content;
    }
    return $content . '<p class="post-topics">' . $list . '</p>';
}
add_filter('the_content', 'ndriel_show_topics');
Each term is already a link to /topic/<term>/, where WordPress lists every post in
that topic. That archive is the payoff of a public taxonomy.
Result of registering the custom taxonomy.
After assigning the topics PHP and Security to a post and viewing it,
WordPress lists both terms as links below the content. The REST endpoint confirms the taxonomy
registered and is attached to post:
GET /wp-json/wp/v2/taxonomies/topic
{"name":"Topics","slug":"topic","types":["post"],"hierarchical":true,
 "rest_base":"topic"}

On the post itself:
Topics: PHP, Security      (each links to /topic/php/ and /topic/security/)
Notes on the custom taxonomy:
- Always flush rewrite rules after adding a
rewriteslug, or the
term archives 404. Do it from an activation hook, or by saving the Permalinks screen —
never on everyinit, which is slow. - Set
'show_in_rest' => trueso the taxonomy works in the block
editor and appears at /wp-json/wp/v2/topic. Without it, the panel falls back to the
classic meta box and the REST route is missing. - Keep the taxonomy key short, lowercase, and unprefixed by
wp_,
which is reserved for core. A clash silently breaks registration. - One taxonomy can attach to several post types — pass an array as the second argument,
for examplearray('post', 'page'). - Taxonomies pair naturally with a custom content type. If you have built one, see how to
register a custom post type in WordPress
and attach this taxonomy to it instead ofpost.