Amazon EC2 Instance is a virtual computing environment, or simply a virtual server in the Amazon Web Services (AWS) Cloud provided by Amazon Elastic Compute Cloud (Amazon EC2).
AWS also provides free tier in your first year that includes 750 hours of t2.micro instance type, and free 30 GiB of EBS storage, to name a few. This is enough to get you started with server administration, whether you are a beginner and is still trying out how to set things up, or someone who is starting out a small website or application.
Requirements:
- AWS Account
How To Create Amazon EC2 Instance.
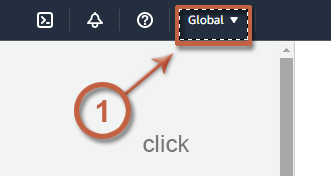
Step 1.
Find the Regions Menu. This is where the instance will be launched from.
Click the Regions Menu from the upper right corner.
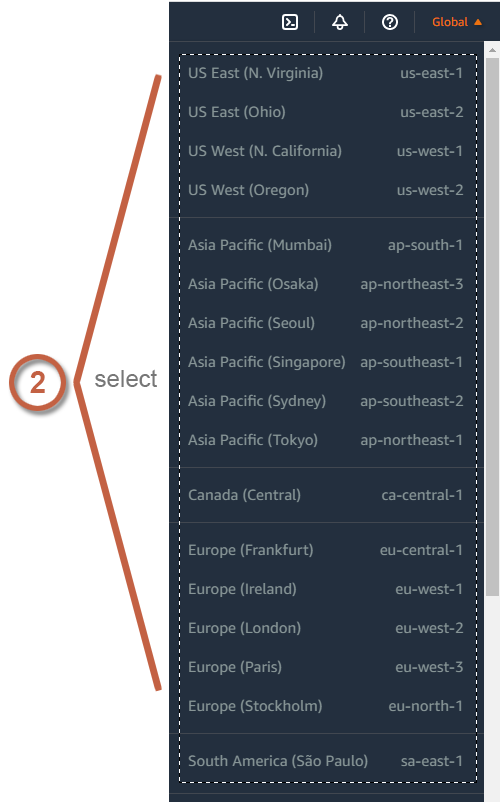
Step 2.
Select a region. It is important to consider the location of the target users/audience in selecting a region. If it is expected to have users from the US, better to select a US region. If later on a new group of audience develop from a different region, a load balancer can be added to handle users from such new region.
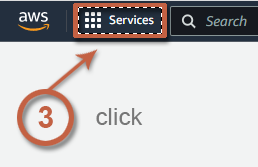
Step 3.
Find the Services Menu.
Click Services from the upper left corner.
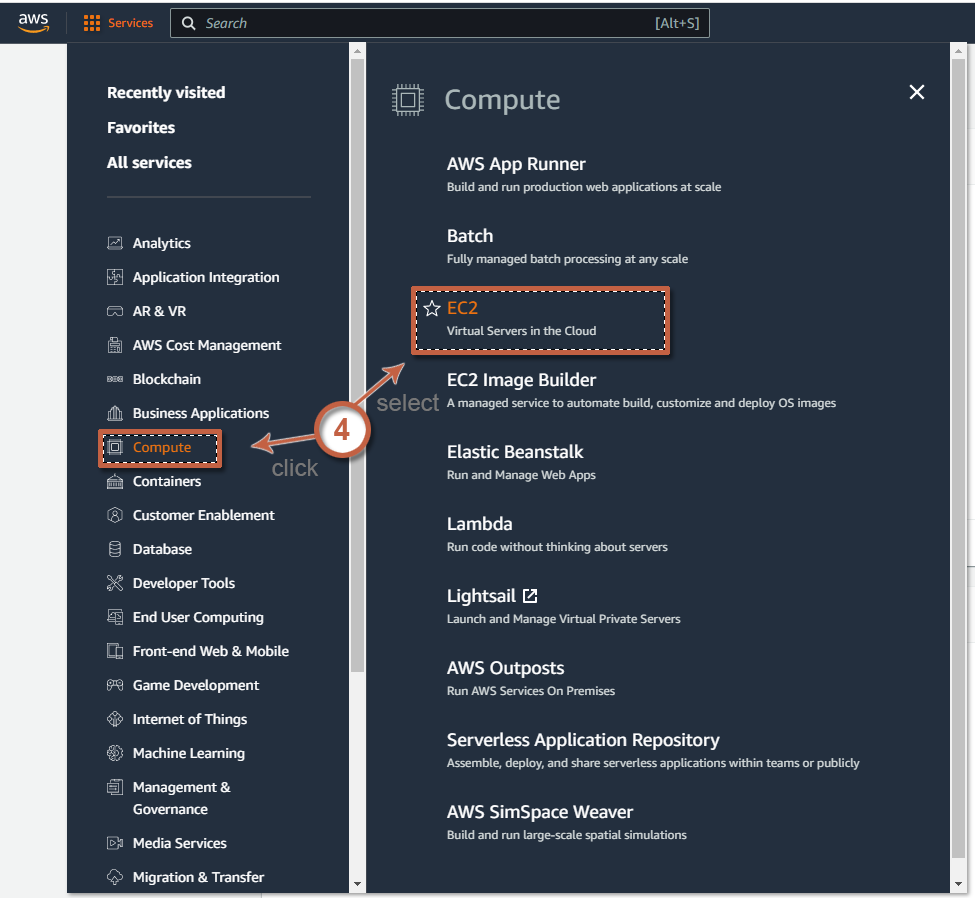
Step 4.
Find EC2 from the Services Menu.
Click Compute and select EC2.
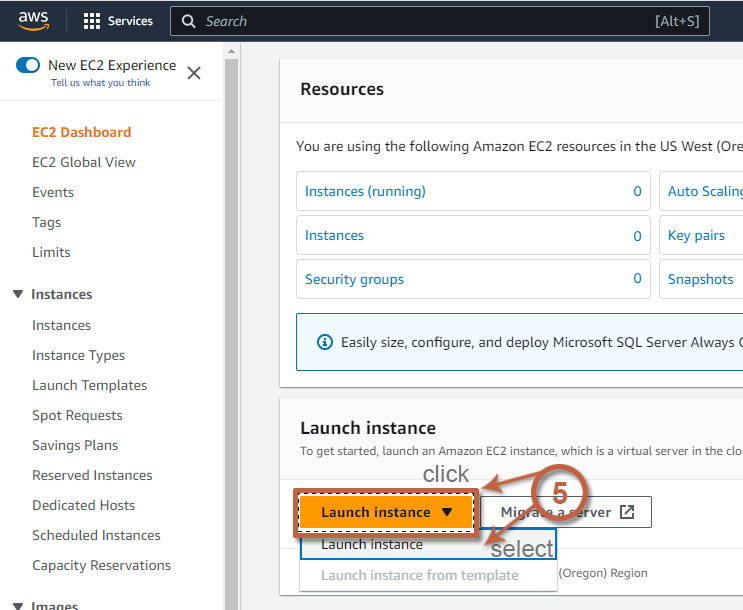
Step 5.
You will be redirected to the EC2 Dashboard.
Click the Launch Instance dropdown, and select Launch Instance.
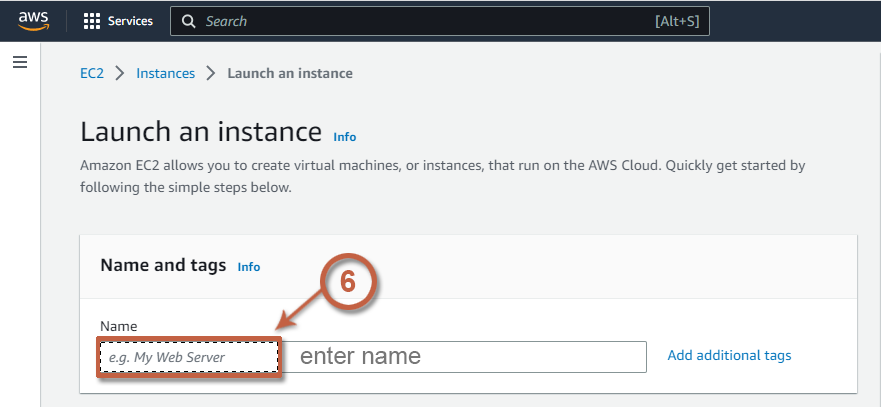
Step 6.
You will be redirected to the Launch an instance page.
Name and tags.
Enter the desired name. This is optional but to easily manage it along with the other instances, better to name it and make it descriptive as to it’s intended purpose.
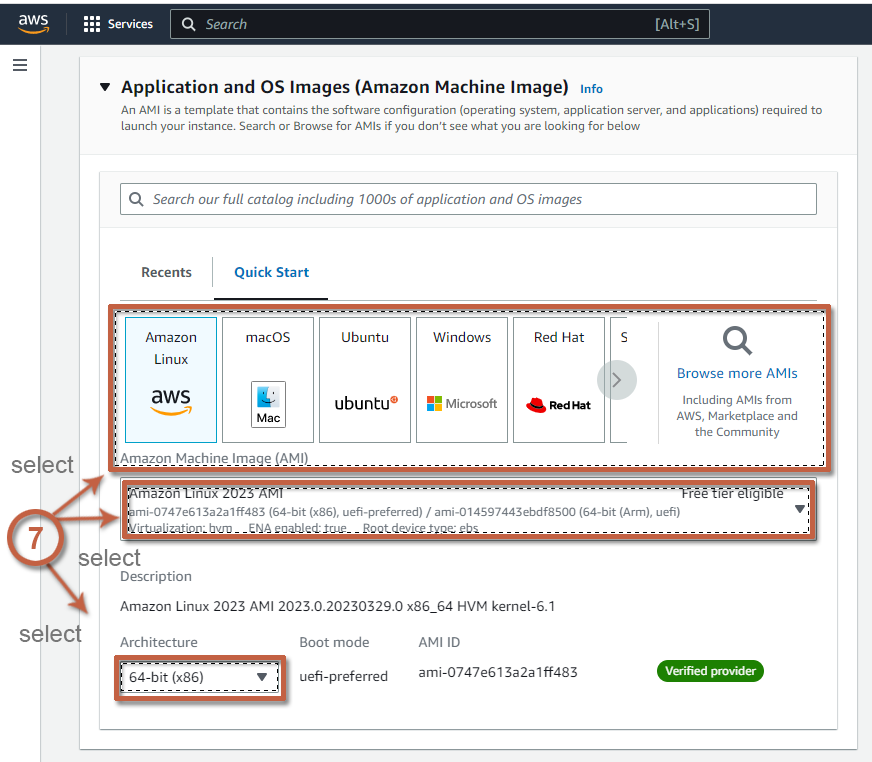
Step 7.
Application and OS Images (Amazon Machine Image).
Select which AMI will be used that contains the software configuration (operating system, application server, and applications) you will be using.
For this tutorial, the Free tier eligible AMI will be selected.
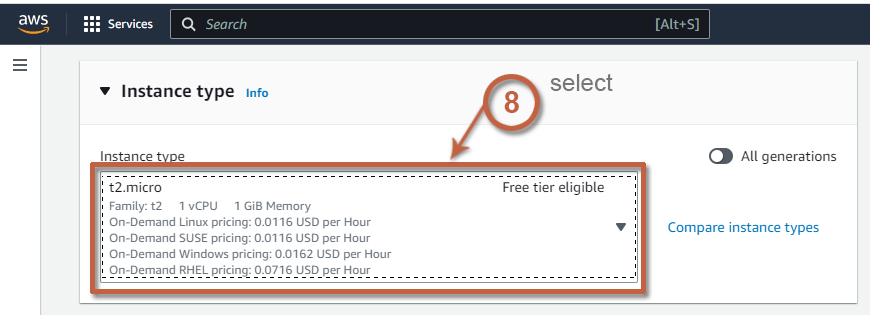
Step 8.
Instance type.
Select a Free tier eligible instance type.
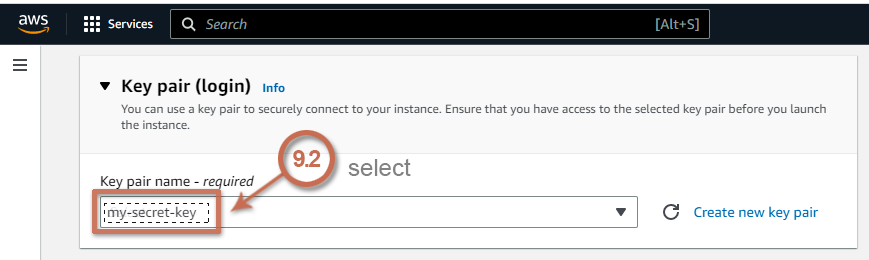
Step 9.
Key pair (login).
Securely connect to your instance by using a key pair. Without this, you cannot access your instance.
Click on Create new key pair.

The Create key pair box will appear.
Enter the desired Key pair name and click Create key pair.
The format is .pem for it will be used for OpenSSH. Otherwise, set the format to .ppk for PuTTY usage. There are free available converters online if in case you decide to switch to whichever format to use in the future.
The file will auto download and the Create key pair box will auto close. Make sure to keep the file secure for this is the key to connect to your instance.

The new key pair should now be available on the dropdown, select it, if not click the refresh button.
Step 10.
Network settings.
It depends on your use case, usually for starters, select the default security group.

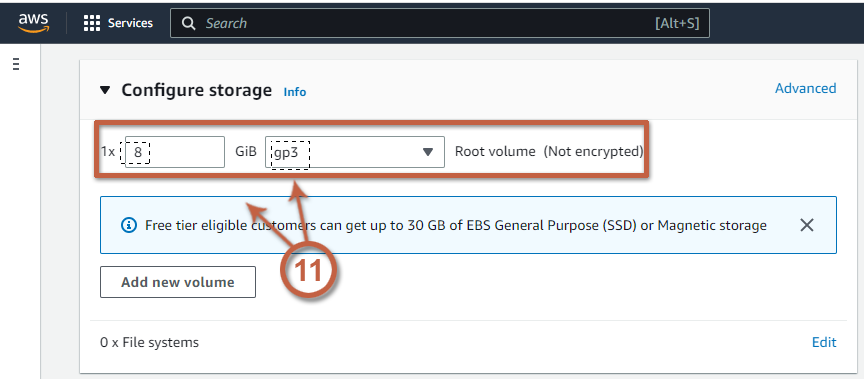
Step 11.
Configure storage.
It depends on how the instance will be used, storage can be set higher or lower as per your needs. for now, for this sample, leave the default options as it is.
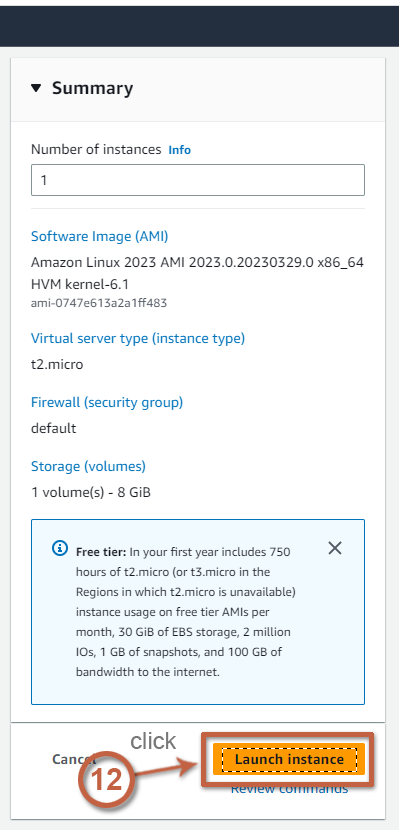
Step 12.
Check the Summary and click Launch instance button.
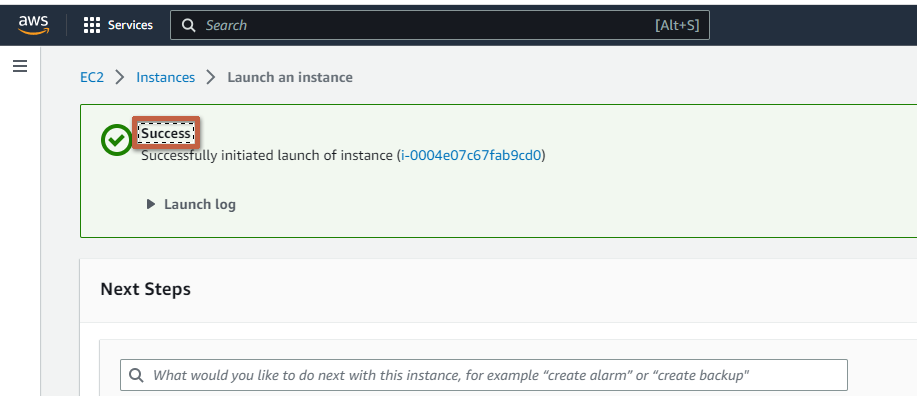
Launching instance progress will appear.

If successful, below is the similar message that will appear.
To check the newly created instance.
Click the Instances from the left menu, and find the newly created instance from the list.

Notes:
- Always secure your key pair.
- Stop your instance if you are not using it, you will be charged even if you are not using it but the instance state is still running.
Leave a Reply