A custom Gutenberg block normally arrives with npm, JSX and a bundler, but none of that is required. First, register_block_type() reads a block.json file and wires the block into WordPress. Next, wp.blocks.registerBlockType() describes the block in plain JavaScript. Then wp.element.createElement() builds the markup, so there is no JSX to compile. Finally, the block saves static HTML into the post. The whole plugin is four small files you can edit in place.
Requirements for a custom Gutenberg block:
- WordPress 6.7 or newer (tested on WordPress 7.0.4). The block editor ships with core, so there is nothing to install.
- PHP 8.0 or newer (tested on PHP 8.5.7).
- Write access to wp-content/plugins, plus an administrator login.
- No Node, no npm, no build tool. That is the point of this approach.
How To Create a Custom Gutenberg Block Without a Build Step.
The objective is a Notice block: a callout box the author types into. It appears in the inserter, renders in the editor, and saves plain HTML to the post.
Step 1.
First, create the plugin folder and its main file. The block lives in a sub-folder, because register_block_type() takes a directory.
wp-content/plugins/ndriel-blocks/
├── ndriel-blocks.php
└── notice/
    ├── block.json
    ├── index.js
    └── style.css
Next, add the plugin header to ndriel-blocks.php. WordPress reads this comment to list the plugin.
<?php
/**
 * Plugin Name: NdrieL Blocks
 * Description: Example blocks for the ndriel.com Gutenberg tutorials.
 * Version:     1.0.0
 * Requires at least: 6.7
 * Requires PHP: 8.0
 */

defined( 'ABSPATH' ) || exit;
Step 2.
Then describe the block in notice/block.json. This file is the block’s metadata, so the editor learns its name, title, icon and attributes from here.
{
	"$schema": "https://schemas.wp.org/trunk/block.json",
	"apiVersion": 3,
	"name": "ndriel/notice",
	"title": "Notice",
	"category": "widgets",
	"icon": "info",
	"description": "A short callout box built without a build step.",
	"textdomain": "ndriel-blocks",
	"attributes": {
		"message": {
			"type": "string",
			"default": "Heads up: this box came from a custom block."
		}
	},
	"editorScript": "ndriel-notice-editor",
	"style": "file:./style.css"
}
Notice that editorScript holds a plain handle, not a file: path. That difference is what removes the build step, and step 4 explains why.
Step 3.
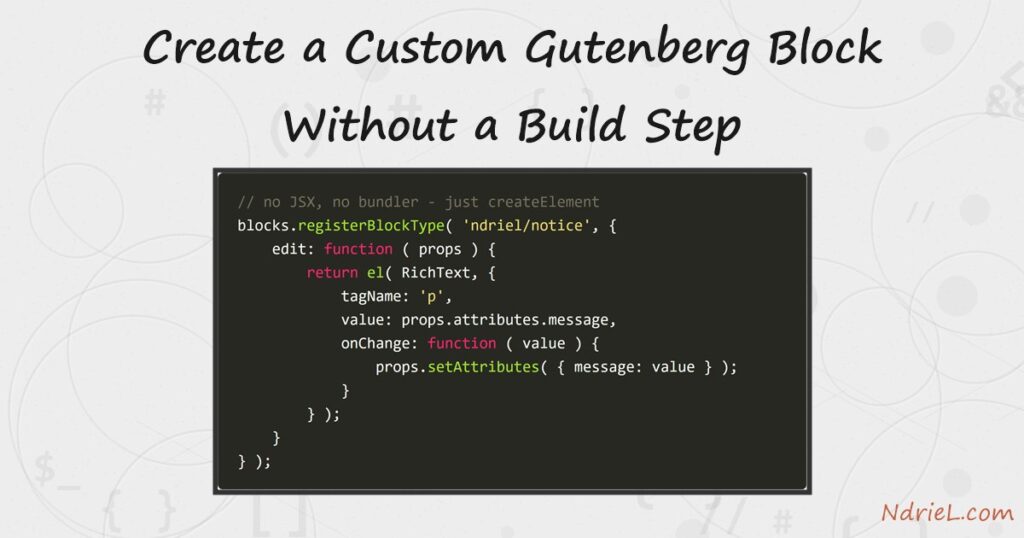
Next, write the block itself in notice/index.js. Because there is no compiler, the code uses wp.element.createElement() instead of JSX.
( function ( blocks, element, blockEditor ) {
	var el = element.createElement;
	var useBlockProps = blockEditor.useBlockProps;
	var RichText = blockEditor.RichText;

	blocks.registerBlockType( 'ndriel/notice', {
		edit: function ( props ) {
			var blockProps = useBlockProps( { className: 'ndriel-notice' } );

			return el( RichText, Object.assign( {}, blockProps, {
				tagName: 'p',
				value: props.attributes.message,
				placeholder: 'Write the notice...',
				onChange: function ( value ) {
					props.setAttributes( { message: value } );
				}
			} ) );
		},

		save: function ( props ) {
			var blockProps = useBlockProps.save( { className: 'ndriel-notice' } );

			return el( RichText.Content, Object.assign( {}, blockProps, {
				tagName: 'p',
				value: props.attributes.message
			} ) );
		}
	} );
}( window.wp.blocks, window.wp.element, window.wp.blockEditor ) );
The two functions do different jobs. edit draws the block inside the editor, so it is interactive. Meanwhile save returns the markup stored in the post content.
Step 4.
Then register the script by hand and load the block. A real build writes an index.asset.php listing dependencies; without one, WordPress cannot know that the file needs wp-blocks. So declare them yourself.
add_action( 'init', function () {
	wp_register_script(
		'ndriel-notice-editor',
		plugins_url( 'notice/index.js', __FILE__ ),
		array( 'wp-blocks', 'wp-element', 'wp-block-editor' ),
		'1.0.0',
		true
	);

	register_block_type( __DIR__ . '/notice' );
} );
That handle matches the editorScript value from step 2. As a result, the editor loads the script only after its three dependencies. The technique is the same one behind enqueueing CSS and JavaScript in WordPress, applied to the editor instead of the front end.
Finally, style the box in notice/style.css. The style key loads it on both sides, so the editor matches the site.
.ndriel-notice {
	border-left: 4px solid #c8663c;
	background: #fdf3ee;
	padding: 1rem 1.25rem;
	margin: 1.5rem 0;
}
Now activate NdrieL Blocks in the Plugins screen. Then open any post and insert the Notice block from the inserter.

Result of the custom Gutenberg block.
The block stores ordinary HTML in the post. Because save returns real markup, the saved content stays readable.
<!-- wp:ndriel/notice -->
<p class="wp-block-ndriel-notice ndriel-notice">Heads up: this box came from a custom block.</p>
<!-- /wp:ndriel/notice -->
On the front end the stylesheet turns that paragraph into the callout.

Notes on the custom Gutenberg block:
- The comment delimiters matter. WordPress parses
<!-- wp:ndriel/notice -->to find the block, so editing the saved HTML by hand can break validation. - If the block shows “this block contains unexpected or invalid content”, the markup that
savereturns no longer matches what is stored. Changesaveand existing posts invalidate, which is the usual cause. - Plain JavaScript costs you JSX and modern syntax, but it keeps the plugin editable on the server. For a large block set, a build step earns its place.
- A block is not always the right tool. When the output belongs in a theme template or a widget area, a shortcode in WordPress stays simpler.
- Keep
apiVersionat 3. Older values opt out of the iframed editor canvas and change how styles apply.